Seeing others in the EEG create 3D prints of various terrain, I’ve become a little jealous that they are having all the fun! It’s a simple, thousand-step process…
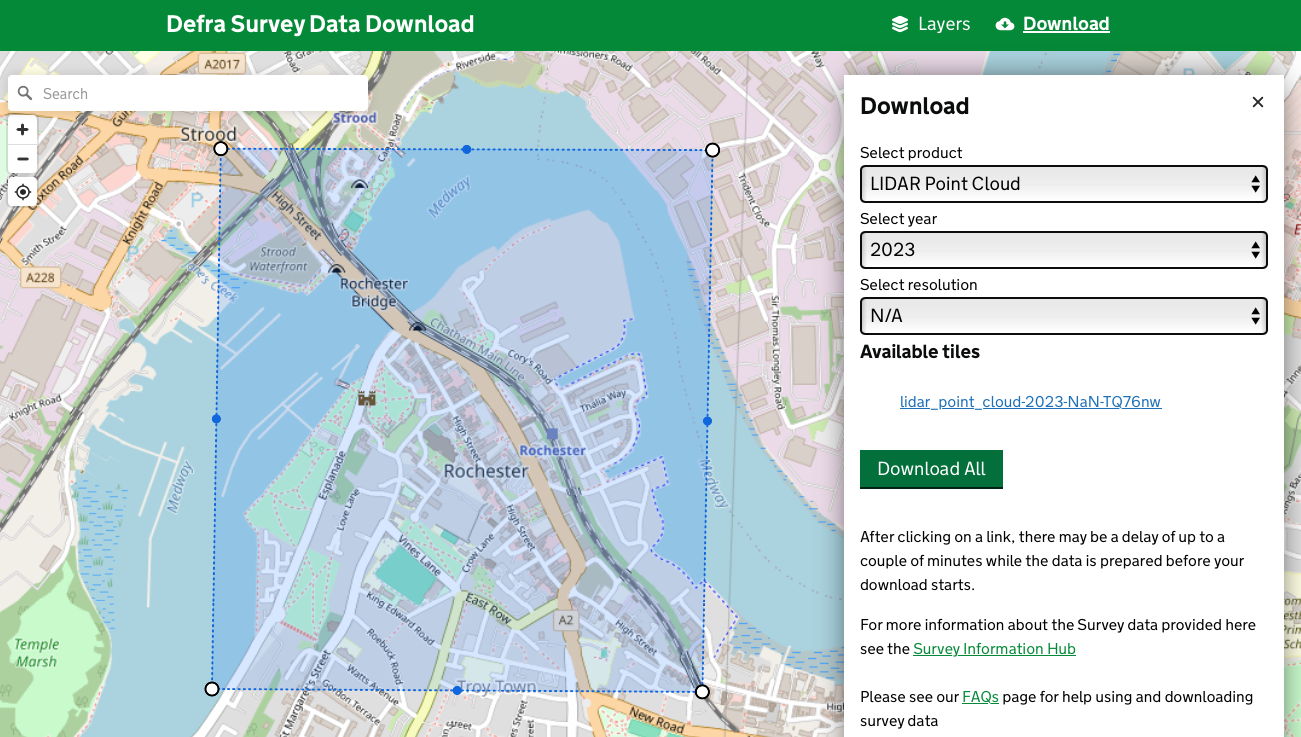
The Departmart of Environment has a data portal which allows anyone to download LIDAR Point Cloud data. Rochester has a river, a castle and a cathedral, which sounds perfect for my print. The latest data for Rochester was 2023. The website allowed you to draw a polygon of the area of interest and download the relevant files.
This gave me a ZIP file containing these LAZ files.
- TQ7064_P_12689_20230520_20230520.laz
- TQ7066_P_12689_20230520_20230520.laz
- TQ7068_P_12689_20230520_20230520.laz
- TQ7264_P_12689_20230520_20230520.laz
- TQ7266_P_12689_20230520_20230520.laz
- TQ7268_P_12689_20230520_20230520.laz
- TQ7464_P_12689_20230520_20230520.laz
- TQ7466_P_12689_20230520_20230520.laz
- TQ7468_P_12688_20230520_20230520.laz
- TQ7468_P_12689_20230520_20230520.laz
I decided to download CloudCompare based upon the short summary on the Department of Chemistry’s website. It claims to be cross-platform, but the Windows installer seemed to be the course of least resistance. I opened the files one at a time until I found one I recognised.
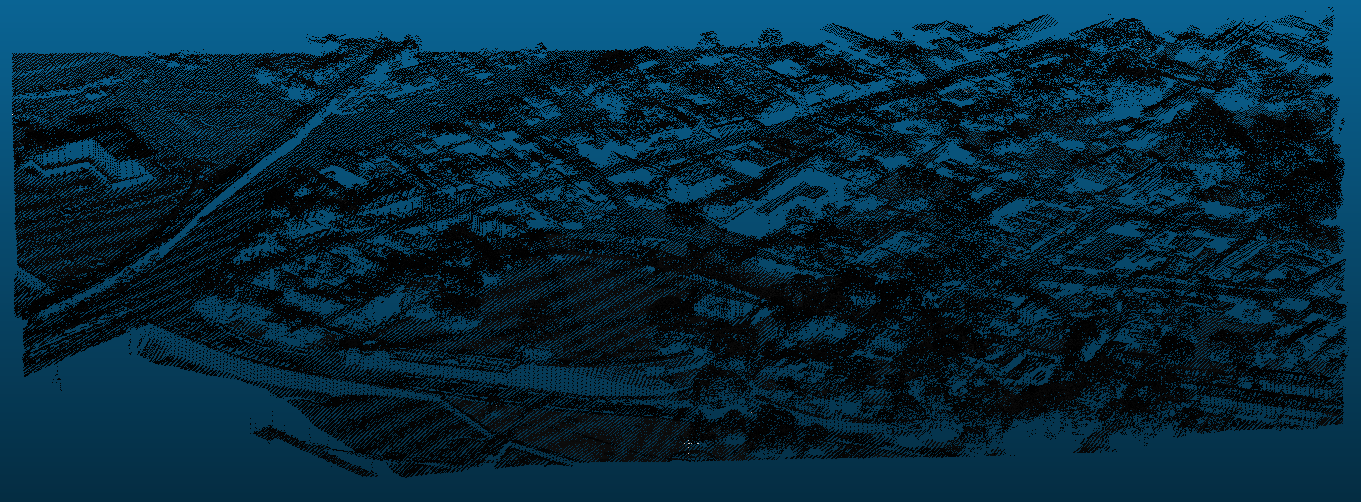
After importing the LAZ file, I use the Segment tool (scissors icon) to draw a polygon around the area I wanted to print. I thinned the number of points by going to Edit > Subsample and accepting the defaults. To create a mesh, I used Edit > Mesh > Delaunay 2.5D and finally saved this surface, File > Save as an STL mesh.
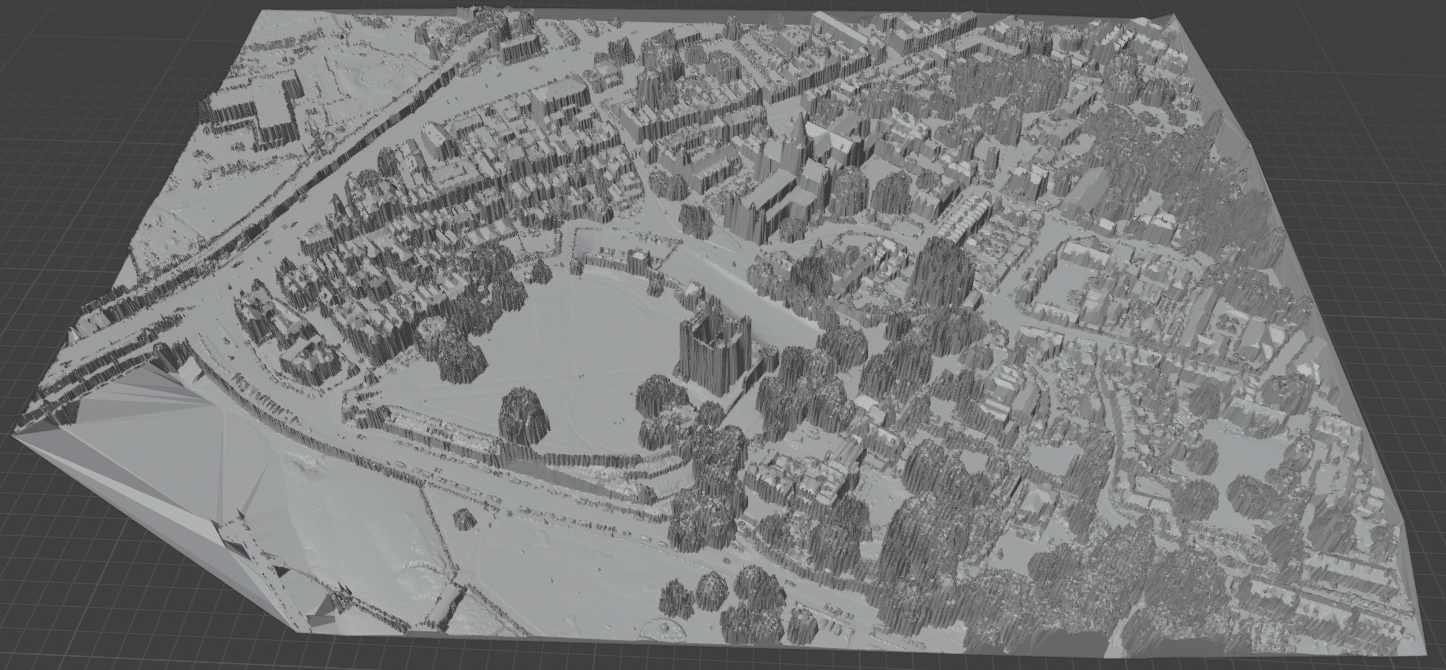
Opening the STL file in Blender shows a thing of beauty; however, it’s not without issues, as it has a vertical wall at some edges, and it’s just a surface with no depth.
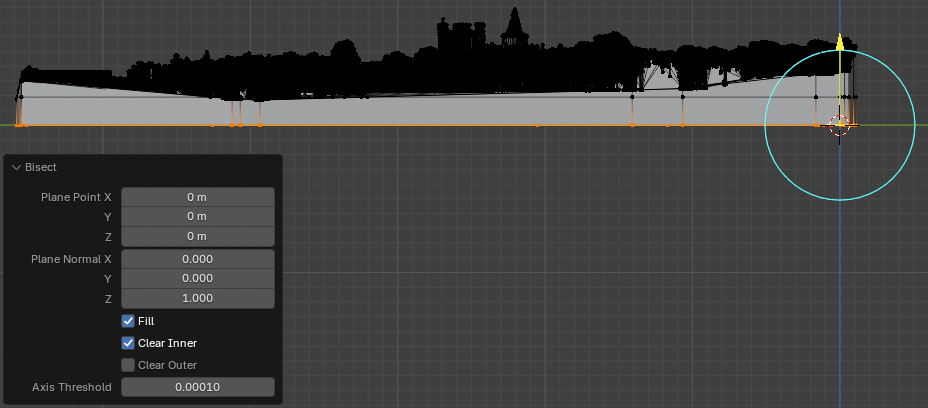
The learning curve in Blender is very steep, and my skills have barely started the journey. Switch to Edit Mode, then select the entire object: Select > All, then Select > Select Loops > Select Boundary Loop. Next, extrude the boundary loop down using Mesh > Extrude > Extrude Edges. I freeform extruded quite a bit; the exact amount doesn’t matter. Pressing Z during the extrusion constrains the extrusion to just the Z axis.

The mesh now has depth but no bottom, and the depth is uneven. In Object mode, move the model so that a cut along the XY Plane will give the flat bottom we are looking for (see image above), then switch back to Edit mode. Select > All, then Mesh > Bisect. On the Bisect dialogue, enter the plane point as the vector (0, 0, 0) and the Plane normal vector (0, 0, 1). Importantly, tick Fill to close the bottom of the shape and Clear Inner to delete the bit we cut off.
I repeated the above steps to crop the edges off the shape. Each time, I repositioned to use an axis as a bisection line and used an appropriate normal vector. This both straightens the shape and removes those final vertical edge artefacts.
The final step in Blender is to go File > Export > STL and save the model.
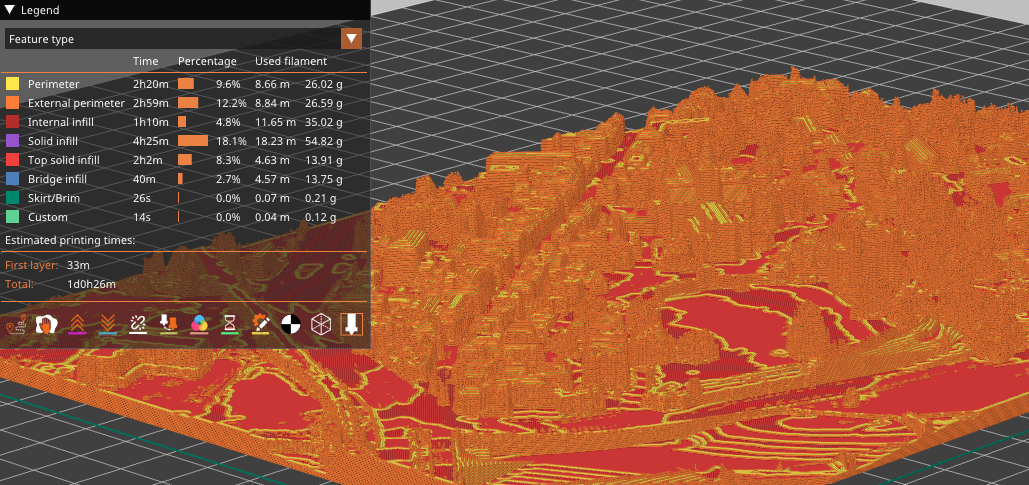
My slicer of choice is UltiMaker Cura, but the application crashed when attempting to slice the model. I installed PrusaSlicer, which was able to slice the model, albeit it took a decent amount of time!
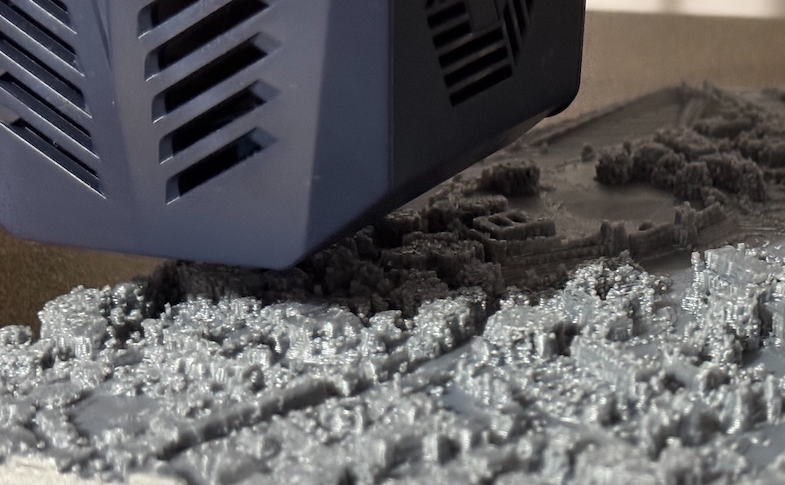
Printing in progress…
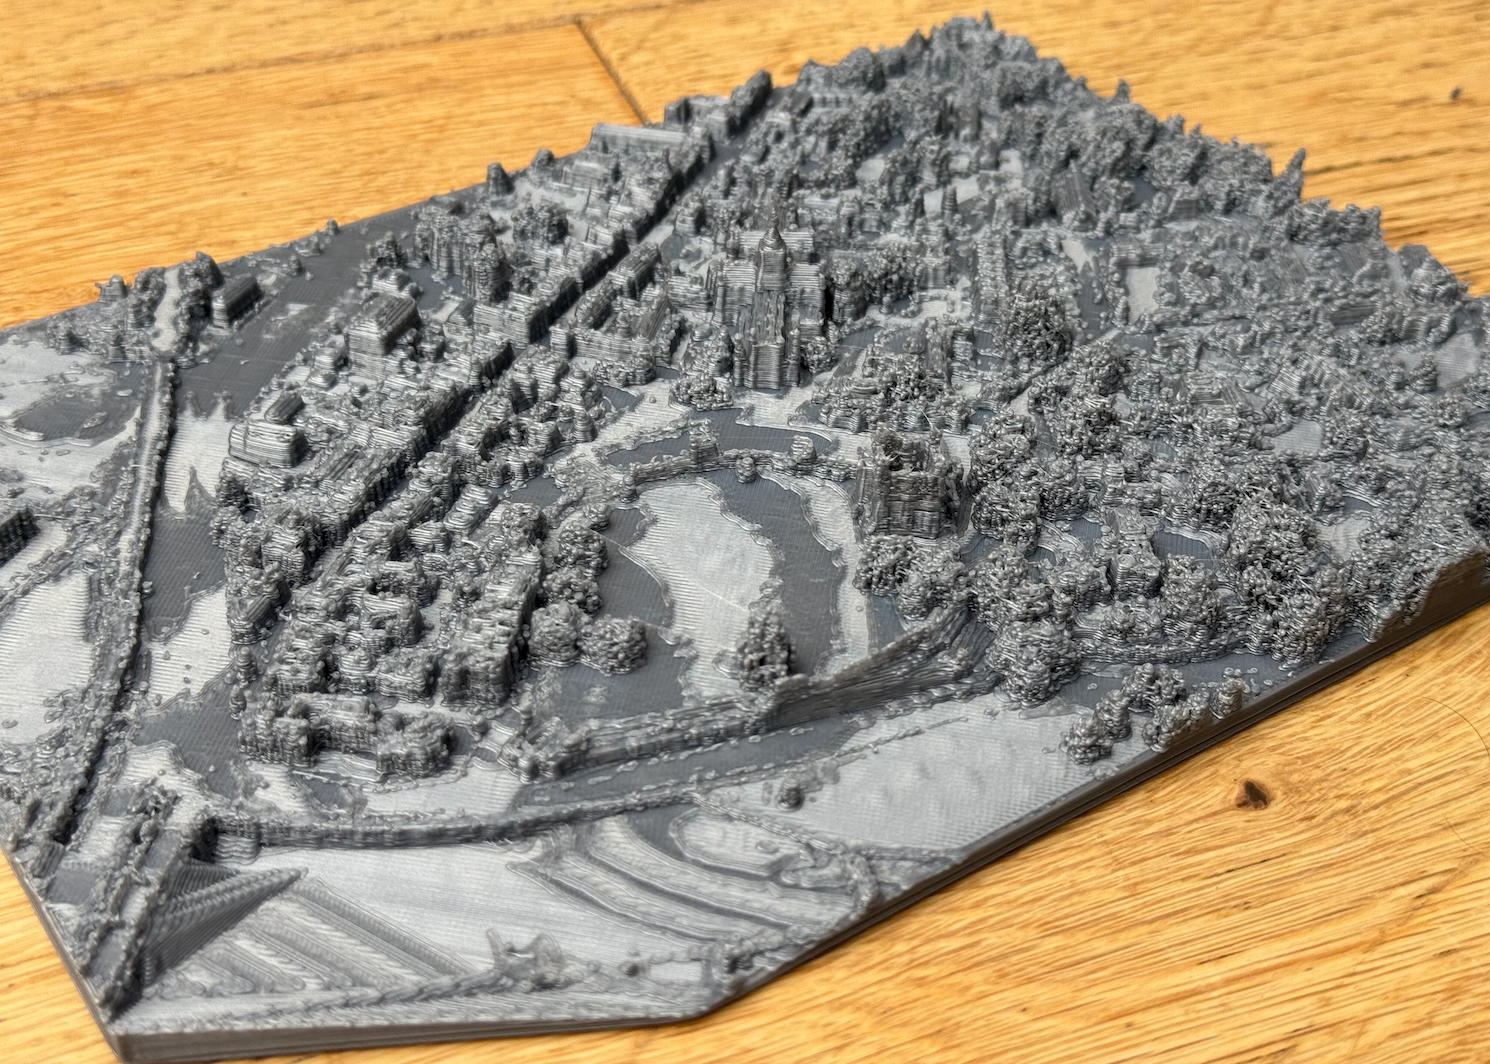
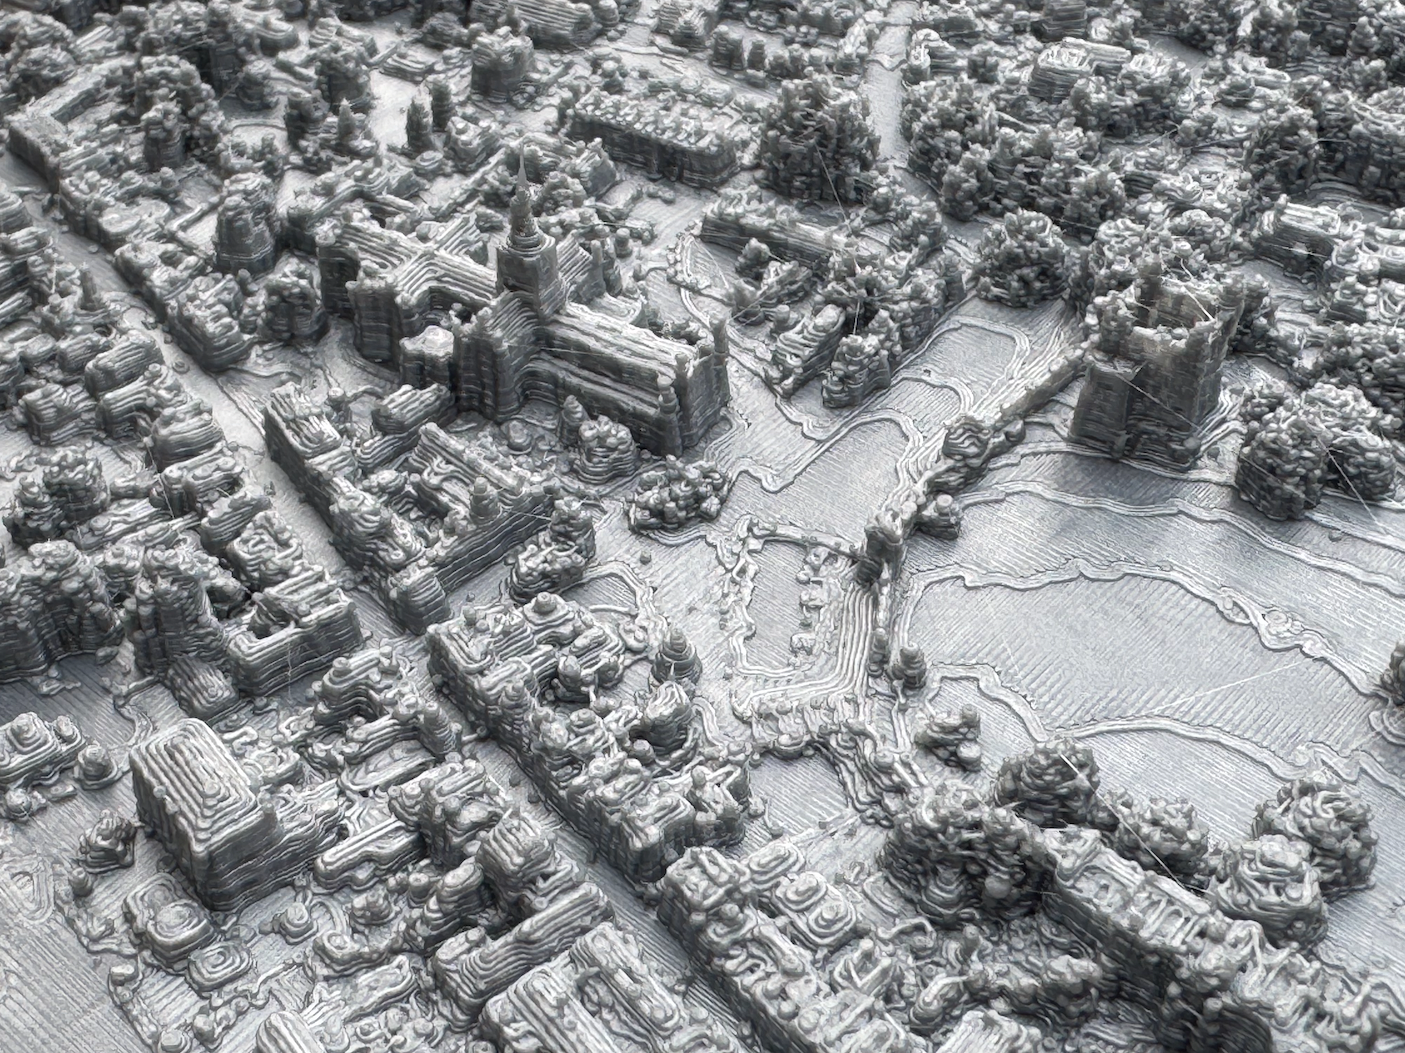
The final model.