I really need a good lens on my Raspberry PI camera to use it with OBS from a decent distance. The new high resolution Rasperberry PI cameras look excellent but they also come with a heafty price tag which I just can’t justify.
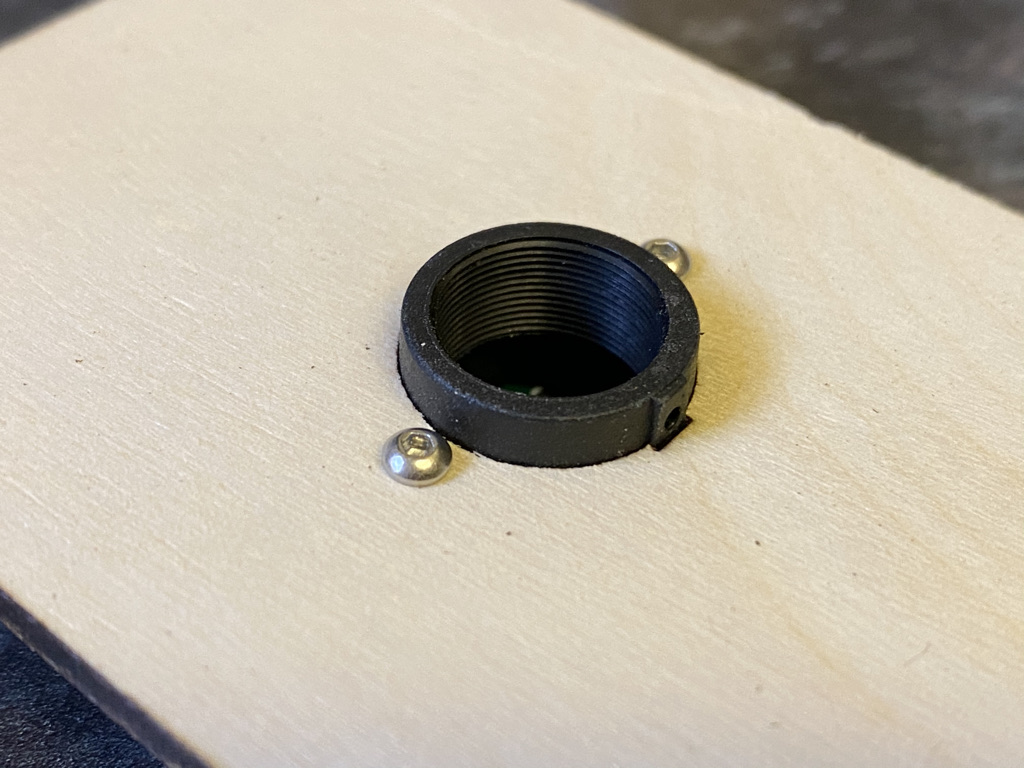
First off, the mounting holes on both v1 and v2 RPi cameras are on 21 mm centers, so the 20 mm spacing of the M12 mount you link isn’t a perfect fit. Depending on your mounting screw size, you may still be able to force it. Second, you have to manually cut or file down a notch in the M12 mount for the micro-flex cable that comes out of the camera module. That isn’t too hard, but if you want, there is also a M12 mount specifically designed for the RPi cameras, with a notch already.
The v1 and v2 sensor sizes are the same, the so-called 1/4-inch format. On V1 the lens focal length is f=3.6mm with Angle of View: 54 x 41 degrees and on V2 it is f=3.0mm with Angle of View: 62.2 x 48.8 degrees [1]. Note the angle of view is quoted at full-frame; remember some video modes use a cropped subset of the full frame. This is a moderately wide angle lens. If you double the focal length, you’ll get half the field of view. If you get a 8mm lens that’s a moderate telephoto, and a 16mm lens is definitely telephoto. I’ve tried a number of cheap M12 lenses that work “ok” but don’t expect perfectly sharp images with the tiny 1.4 or 1.1 micron pixels these camera sensors use. Lower f-number lenses are “faster” (let in more light) but will have more shallow depth of field and more blurry overall. You will see f/1.4 or lower sold for use in low light, but I have not had good images with those; I would recommend f/2.0 or above if you want decent resolution.
https://www.raspberrypi.org/forums/viewtopic.php?t=150344#p988445
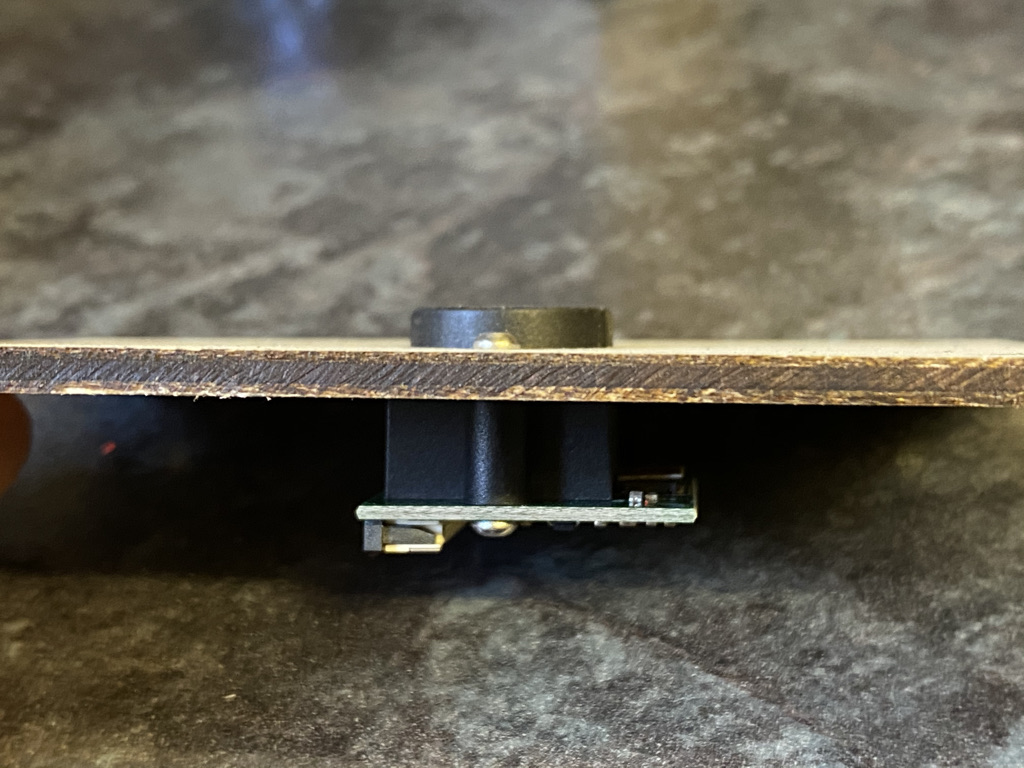
With that as the inspiration I bought a pack of ten M12 lens adapters from Amazon for £5 and started out by creating a notch for the cable. While the 20mm spacing wasn’t ideal I have found some variation in hole positions on the PCB and by using thin M2 bolts I was able to force them.
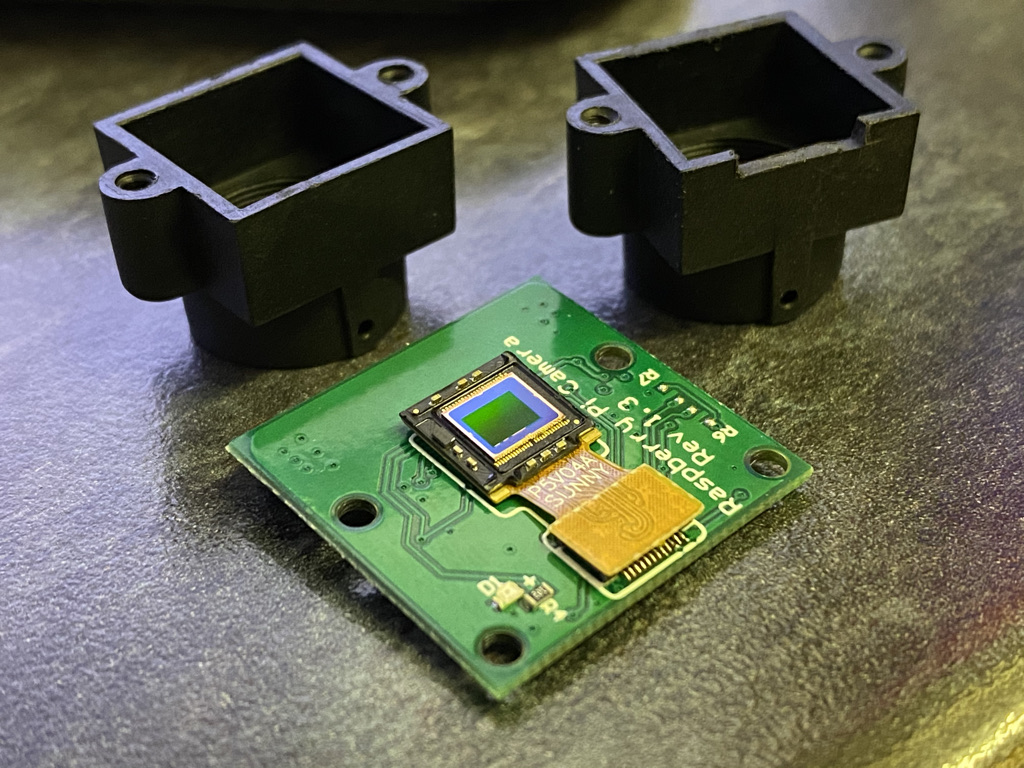
I removed the lens in a rather destructive way from the front of the camera by cutting around the raised area on three sides with a craft knife. It wasn’t pretty but it did the job.
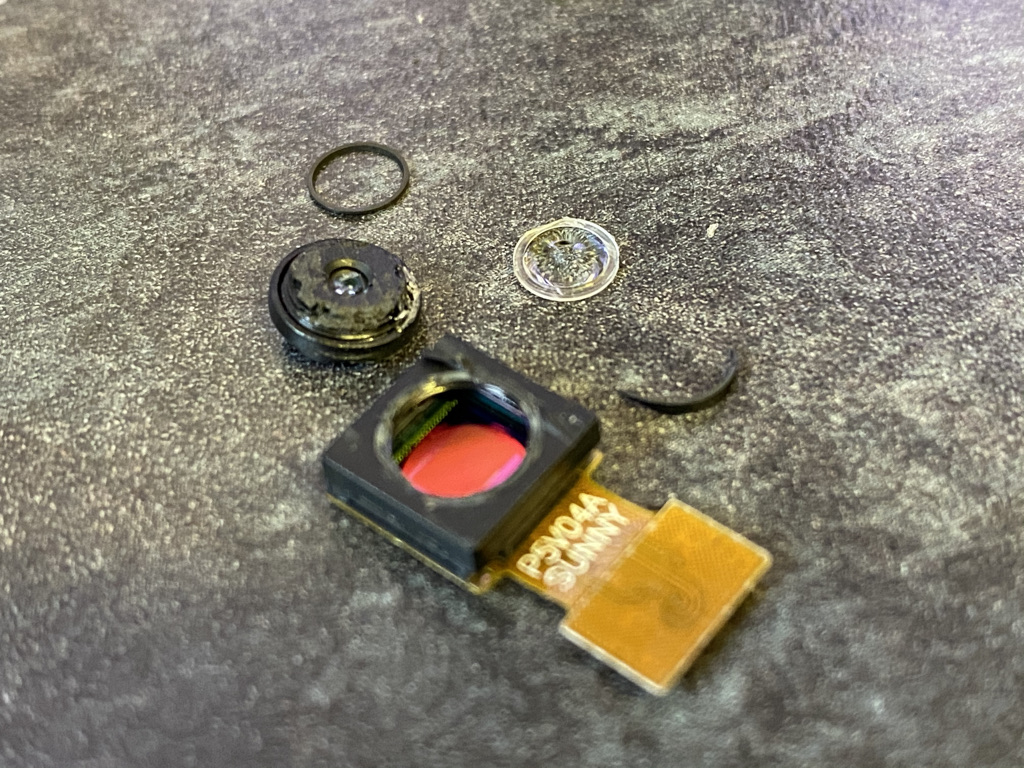
On the first camera I modified I went on to remove the IR filter by gently cutting it across the diagonal with side cutters. Surprisingly it popped off without too much effort leaving this.
For my application, removing the IR filter was a mistake as (tungsten) lights and candles produce lots of infrared!
I mounted the M12 adapters on 3mm plywood with short M2 bolt screwed in from the front.
I had an old Foscam WiFi camera which has an M12 lens marked as f=2.8mm. This pretty much matched the field of view I got from the camera’s native lens.
I have had good results with f=8mm, f=15mm and f=25mm lens as well as cheap zoom lens offering a range of f=3mm to f=12mm. It’s curious that on Amazon a focal length of 8mm is typically sold as wide angle rather than telephoto! What I really notice is that the depth of field becomes increasingly narrow as the focal length increases.
I installed Raspberry Pi OS Lite using the Pi Imager and enabled SSH before removing the SD card.
After assembling the unit check that the camera is connected up and enabled with vcgencmd get_camera
supported=1 detected=1
raspivid can be configured to send an h.264 stream, but it exits when the connection drops. Therefore, I have rolled raspivid as a service so systemd will restart it each time.
Create /etc/systemd/system/stream.service containing
[Unit]
Description=auto start stream
After=multi-user.target

[Service]
Type=simple
ExecStart=/usr/bin/raspivid -v -fps 30 -md 2 -n -ih -t 0 -l -stm -fl -o tcp://0.0.0.0:5001
User=pi
WorkingDirectory=/home/pi
Restart=always

[Install]
WantedBy=multi-user.target
Enable and start the service as follows:
systemctl enable stream
service stream start
You can open the stream with VLC by using the address tcp/h264://192.168.1.88:5001 which is useful for testing.
Finally in OBS connect add a media source tcp://192.168.0.88:5001.


Parts list
| Part | Cost |
|---|---|
| Pi 3B | £34 |
| PoE Splitter - 2 pack | £17 |
| 5MP Camera Module - 2 pack | £9 |
| Zoom lens | £10 |
| M12 Mount - 10 pack | £5 |
| 3mm plywood - 25 pack | £24 |
| SD Card | £3.70 |
A single camera would cost £62.